Two Strokes Only!! (Written for VSCNA newsletter)
Through the Smoke and Bull
As I work on these old Saab bullnoses, many things seem to be a mystery. Today I will tackle the bumpers. They are pretty simple yet have a few quirks to them. Sometimes when I look around at all of my bumper bits, it is hard to figure out exactly what they might fit. “What the heck does that fit?” is something that I seem to say a lot working on these old bullnoses. I also see bumper bits for sale on different websites that are not really what the people selling them think they are. I will attempt to simplify some of these issues here.
First I will tackle the 92 bumpers, even thought there are only about ten people who own a 92! Near as I can tell all 1950-1955 models are the same. The wings are different from FRONT to the REAR but the overrides are the same. They do not use any center sections or splash shields like the 93’s and 96’s do. The mounting bolts are 5/16” carriage bolts, not 3/8” carriage bolts like the 93’s and 96’s use. Good to know before you order new ones! Also, where the carriage bolts got through the wings, there is a dented or recessed area there. This is normal, not a real dent. If you want an original look, do NOT have that “dented” area removed or filled in when re-chroming.
On 1956 model year 92’s, Saab tried to use the same bumpers that the 93 models would later use. Thus they have an “unusual” look to them, like they were not designed for the 92, which they are not!
The 93 and 96 FRONT bumpers assemblies are real simple…they are same for both 93’s and 96’s. So you can swap away all you want. The wings, center sections, brackets and braces, and splash shield are all the same. Saab changed the part numbers many times and some early parts books show different part numbers but they are all the same, in the fit and in the later parts books. (CENTER sections are easy to ID by the license plate slots in them)
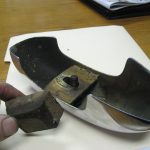
Also, all 93 and 96 overrides are the same for FRONT or REAR. They are the hardest part to find as well, as they are usually all busted and rusted up. When you look at them you would swear there is a “left and right”. But mount them up and they are all the same. Some do look better on the left or right so I do try to match as I install, but they ARE all the same. Here is a tip to installing the overrides as the carriage bolt is hard to hold in place and always falls out of place. Wedge a cork between the bolt head and the override. That will keep the bolt firmly in place and will allow you to “push” on the override to get the bolt to slide through the two bumper pieces holes without the bolt “popping” out of the override. If you ever see an original setup, that’s what Saab used at the factory too! Also I use a carriage bolt that is 1 ¼” long for the overrides. Sometimes I must grind a flat spot on the head of the bolt (or ¼ of the rounded head away) to get the bolt to “slip” into the metal slot on the underside of the override. Otherwise the bolt is just to darn long!
On to the REAR bumpers! Although 93 and 96 rear bumpers look real similar, they are different.
The 93 REAR bumper wings look the same as the 93 and 96 FRONT bumper wings EXCEPT the rear wings only have two holes drilled in them for the mounting brackets carriage bolts to fit through. The 93 REAR wings are missing the 3rd hole that is used by the front bumper bracket outside brace. You can use a set of 93 or 96 FRONT wings on the REAR but then you have to fill the extra hole in by using a chromed bumper carriage bolt to fill in the extra hole not used on the REAR. Or, you can use the 93 REAR wing on the FRONT of a 93 or 96, but then you would need to drill an extra hole for the FRONT bracket side support brace. The two holed 93 REAR bumper wings are pretty rare, so I do not do that if I can avoid it.
The 93 REAR bumper wings use three, ¼” x 20 studs welded on them to hold the splash shields in place, the same as the 93 and 96 FRONT bumpers do. More on splash shields and studs later.
The 93 REAR bumper center section has four holes drilled in it and is only 29” long. And it only has two ¼” x 20 studs to hold the splash shield in place.
The 93 REAR splash shields will not interchange with 96’s. The 1956-1958 splash shield CENTER section is just a simple bent piece of tin, where as the 1959-1960 are formed to house the license plate lights.
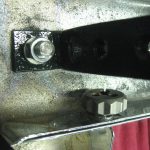
The 96 REAR bumpers are unique to this model and area also. They look real similar to the FRONT but will not interchange. The REAR 96 wings are bent sharply inward to follow the contour of the REAR 96 fender. If you lay them on top of a FRONT bumper wing the difference is easy to see. But lying on the parts shelf by itself, it is tougher to see this sharp curve. Also, if your 96 REAR bumper wing has not been re-chromed, it is easy to tell if you look at the splash shield studs as they are not threaded but are smooth and use a push nut rather than a thread nut to hold them in place. (I use a 6.3mm push nut but it fits a little loose…I just happen to have lots of them to use!)
The 96 REAR center section has four holes drilled in it and looks similar to the 93 but it is longer at 33 ½”. It also has three smooth studs for holding the splash shield in place rather than two as the 93 does. I have cut 96 Rear sections down to fit the 93’s. It takes some more modifying with the mounting holes and splash shield studs but it can be done.
Ok, so now you know how to ID your bumpers, so lets get them re-chromed. Having your bumpers re-chromed is essential on all restoration projects. I have found NOS bumper pieces are too poor in quality to use with most good re-chromed bumpers. Also, the better the piece you send in to be re-chromed, the better it will look when returned to you. Remember, almost ANY piece can be saved, regardless of how bad it looks or is bent or rusted up, it is just a matter of cost and time. When in doubt, send it in and have the shop tell you yes or no or WOW…how much! On the overrides I do not care what it costs, save them. If my memory is correct it cost me about $850 to re-chrome all the bumpers on a car. A few years back it was $450! (Hub caps cost me $80 EACH!)
We repair the splash shield studs and re-shape all the bumper parts as much as we can BEFORE we send them in to be re-chromed. Most companies have little idea of what I Saab bumper should look like so the more you help them the better.
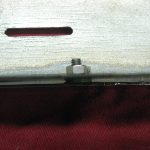
How to fix the splash shield studs. I use a ¼” x 20 x ½” long stud from Fastenal, part #01246665, that has a thin round button head on it rather than a normal bolt style hex head which is too thick. If we are preparing bumpers to be sent out for re-chroming we just TIG weld the new studs in place. We use the splash shields as a “jig” to hold the correct position of the studs on the bumper while welding. (I have let the re-chroming company replace them but sometimes they put them in the wrong location or they use a normal bolt, which gives you too large a gap between the splash shield and the bumper.)
Sometimes however, you have a good USED bumper section you want to re-use (or had it re-chromed already) and you discover it has a bad stud on it. You cannot weld the new stud in place or you will blue the chrome. So, go to your local body shop with your new studs and shiny chrome bumper piece and ask them to glue/epoxy the studs in place. Most body panels are glued on cars today anyway, not welded. This will allow an easy repair with out the need for expensive re-chroming. And since you only need a small amount of glue (about the size of a dime) why buy the whole gun and kit assembly. I would bet many shops would do this for you for a very minimal charge, if not free, if they are your normal body shop.
One last note; fit all your bumpers (as well as fenders and doors) to your body BEFORE you have them repainted. The brackets and other parts always need some bending and tweaking. If you attempt to do this AFTER the parts are all re-finished, it will result in cracking and popping paint! Most frustrating.
Also, once you get the bumpers all re-chromed and the brackets all painted, I think it is much easier to pre-assemble the bumper assembles on a bench, splash shields and all. Then install it as a completed assembly onto the car. Make sure your fenders are already on too. Just tape any area that might get scratched like the inner fender wheels and fenders with wide masking tape. I actually put a glove over my bumper wings to protect the paint on the fenders.
Another quick tip…do not OVER TIGHTEN the bolts! I use a ¼” drive ratchet with a 9/16” socket to tighten all my carriage bolts. It is so easy to over tighten them, which will result in “sunken” button heads in the bumpers. It will also quickly deform your nice, new, expensive overrides! Snug is tight enough! Walk around an SOC sometime and see all the carriage bolt heads that are “dented” into the bumpers from over tightening. Once all the bumpers are installed, it is very common to have to use washers for shims between the brackets and the bumpers for proper alignment and fit.
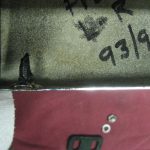
If you are doing your bumpers before you need them, (or spare ones) I will add an extra complete set of splash shield studs to the bottom of the edge on the bumper also, there by making them ambidextrous. Larry “Strokers” Williams law say…”if you need one right and one left you will only have two left”. This way I short-circuit Larry’s Law! Also if there is a flaw in the chrome I can just swap sides with them.
Oh ya…one more thing…if your splash shield studs are good (run a die over the studs and check them all before you re-chrome them) tell the company to cover them to protect the studs from being chromed. If your studs get chrome then the studs will need a die ran over them to make a nut fit properly. This can be a real pain since you cannot use the die handle to spin the die as you normally would since the stud is “captured” inside the bumper. I use a 1” socket and ratchet on the die to turn it and re-thread the chrome off.
Hope this helps someone! I know it helped me just checking all my facts!
As always…Safe Saab’en! Tom Donney 😆




Awesome! Its in fact awesome piece of writing, I have got much clear idea concerning from
this article.